Flash firmware on Samsung Galaxy A7 SM-A710F/DS
Mobiles >> Samsung >> Samsung Galaxy A7 SM-A710F/DS| Specifications | Reviews | Secret codes |
| Unlock phone | Root phone | Bypass FRP |
| Backup | Flash Firmware | Screenshot |
How to flash Samsung Galaxy A7 SM-A710F/DS?
Why reinstall the firmware?
Errors in the operation of the Android OS begin to appear.
Some applications do not open, reinstalling which does not lead to a positive result.
Some programs from the Play Market do not start.
The phone restarts or shuts down by itself.
The phone started to work slowly.
You want to update your firmware.
Where can I find the firmware?
On the official website of the phone manufacturer.
On specialized resources where users post custom or official OS.
What should be done before installing the firmware?
Create a backup copy of all personal information: contacts, photos and transfer it to another computer.
Insert your SD card into your phone. An SD card is needed to write firmware to it.
Remember your smartphone model.
Fully charge your phone battery.
Find and download the archive with Firmware. Place it on the SD card.
Installing TWRP Recovery
Download the Official TWRP App to your phone from the Play Market. And install this app.
When you start the application for the first time, you must agree to install the firmware, as well as agree to grant the application Superuser rights and click the 'OK' button.
On the next screen, select 'TWRP FLASH' and give the application root rights.

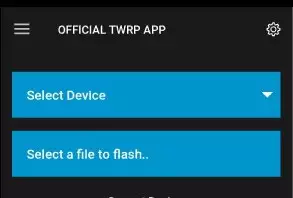
On the main screen of the application, select 'Select Device', and find your phone model.
After selecting a phone, the application will direct the user to a web page to download the modified recovery environment image file. Download the proposed *.img file.
After downloading the image file, go to the main screen of the Official TWRP App and press the 'Select a file to flash' button. Select the file downloaded in the previous step.
Now press the 'FLASH TO RECOVERY' button and confirm your choice, press 'OK'.
When the message 'Flash Completed Succsessfuly!' appears. Click 'OK'. The TWRP installation procedure is now complete.
Copy the required files to the SD card. Using a PC or laptop card reader, it will be much faster.
Insert a SD memory card into the phone.
To reboot into recovery, you need to use a special item in the Official TWRP App menu, accessible by pressing the button with three stripes in the upper left corner of the main screen of the application. We open the menu, select the 'Reboot' item, and then click on the 'REBOOT RECOVERY' button. The phone will reboot into the recovery environment automatically.
Firmware via TWRP

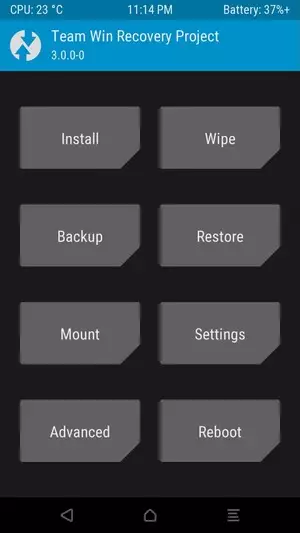
Before flashing, you need to delete all user data from the phone, this will avoid errors in the software, as well as other problems. Press 'WIPE' on the home screen.
Now you can start flashing. Press the 'Install' button.

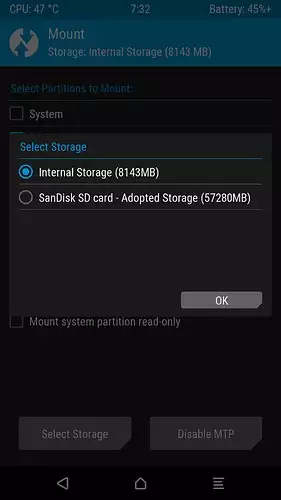
The file selection screen is displayed. At the very top is the 'Storage' button, select the location where the firmware file is located.
Select the location where you copied the files..

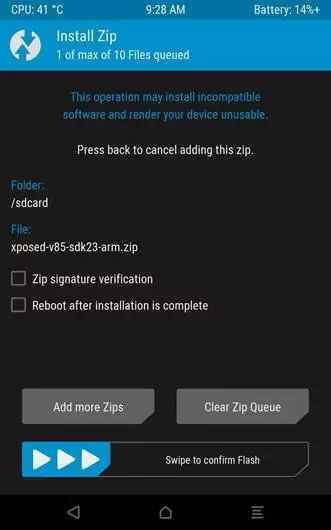
Select the firmware file and click on it. A screen opens with a warning about possible negative consequences, you need to check the item 'Zip signature verification', which will avoid using damaged files during recording.
The procedure for flashing the phone will begin, this is accompanied by the appearance of inscriptions in the log field and the movement of the progress bar.
The completion of the firmware installation procedure is indicated by the inscription 'Successful'.
Summary: Type: smartphone; Band: LTE, 3G (UMTS), GSM 900, GSM 1800, GSM 1900; Platform: Android; Smart Phone OS: Android 5.1; Processor: Samsung Exynos 7580; Number of processor cores: 8; CPU frequency: 1 600 MHz; GPU: Mali-T720; RAM: 3 072 Mb; Internal RAM: 16 GB; Memory Card Slot: yes; Memory card support: microSD (TransFlash), micro SDHC, micro SDXC; The maximum amount of memory card: 128 GB; Year of issue: 2016; Dimensions (WxHxT): 151.5x74.1x7.3x172 mm; Enclosure type: classic; Housing material: metal and plastic; The number of SIM-cards: 2; SIM: nano SIM; Fingerprint: yes; Water resistant: no; Shock-resistant enclosure: no; Color screen: yes; Screen type: AMOLED; The num ...
Comments, questions and answers on the flash firmware Samsung Galaxy A7 SM-A710F/DS
Ask a question about Samsung Galaxy A7 SM-A710F/DS


